MCP Server 服务端
# 1. 如何配置?
① 在项目的 application.yaml 中,配置 spring.ai.mcp.server 配置项,开启 MCP Server ,如下所示:
spring:
  ai:
    mcp:
      server:
        enabled: true
        name: yudao-mcp-server
        version: 1.0.0
        instructions: 一个 MCP 示例服务
        sse-endpoint: /sse
友情提示:
具体每个配置项的作用,可见 《Spring AI 官方文档 —— MCP Client Client Starter》 (opens new window) 文档。
② 使用 “Functions as Tools” (opens new window) 的方式,编写 MCP Server 的工具。
例如说:cn.iocoder.yudao.module.ai.tool.method 包下的 Person、PersonService、PersonServiceImpl 类。
③ 在 AiAutoConfiguration 的 #toolCallbacks(...) 方法,注册 MCP Server 的工具。
例如说:PersonService Bean 。
接着启动后端项目,可以看到 INFO o.s.a.m.s.autoconfigure.McpServerAutoConfiguration 日志,表示 MCP Client 启动成功。
# 2. 如何测试?
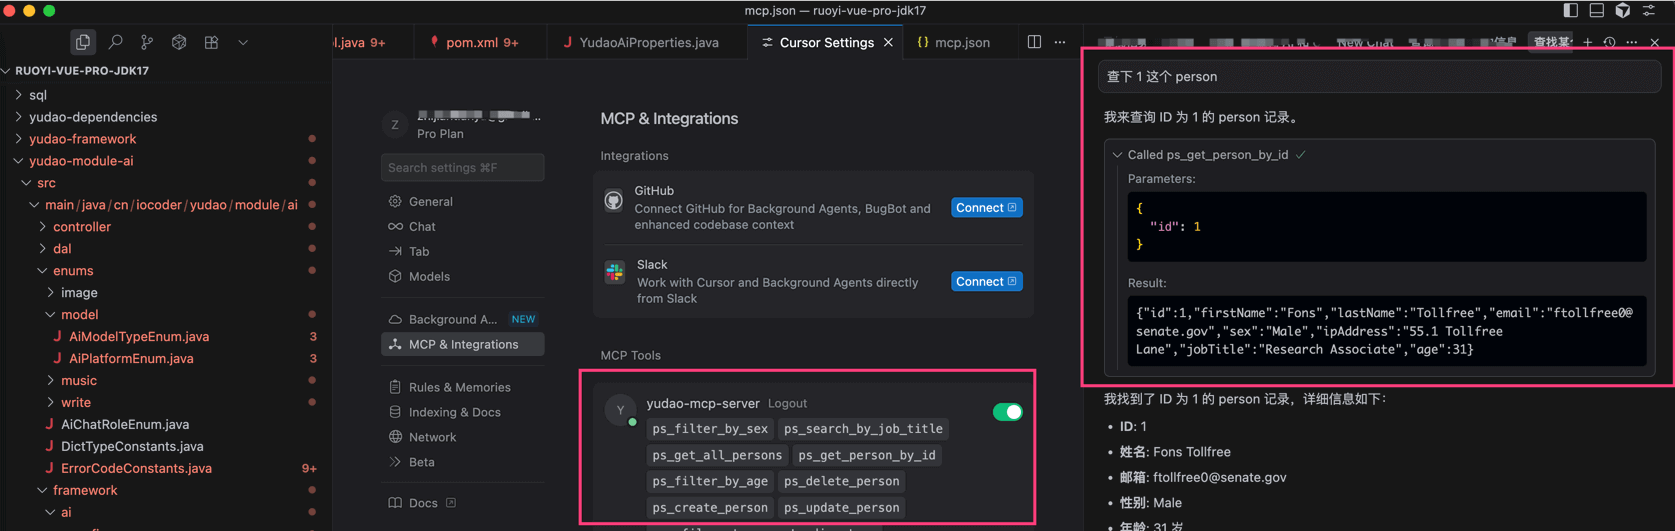
① 找一个支持 MCP Server 的工具,例如说 Cursor 或者 Claude 等。这里使用 Cursor,例如说:
{
  "mcpServers": {
    "yudao-mcp-server": {
      "url": "http://127.0.0.1:8089/sse"
    }
  }
}
② 在 Cursor 输入 “查下 1 这个 person” 消息,触发 MCP Server 的调用。如下图所示: